Visually appealing and easy to maintain, the Subpod garden compost system makes a great choice for beginner composters (like me). In this Subpod review, I’m sharing my top 5 reasons why you should give this in-ground compost system a try too.
A big thank you to Subpod for generously supplying my garden with a Subpod Mini. If you would like to try a Subpod garden compost system yourself, use Subpod promo code LEAH10 to receive 10% off your purchase.
For your convenience, this post contains direct affiliate links for Subpod. If you make a purchase through these links, I may receive a small commission at no additional cost to you.
5 Reasons to Try the Subpod Garden Compost System
1. Subpod has several options to fit any living situation: Subpod Classic, Subpod Mini, and the Modbed.
Subpod Classic (Dimensions: 29.5″ L x 17.7″ W x 16.9″ H)
- Largest compost bin option, two separate composting sections
- Composts up to 34 lbs of food per weeks, for household with 4-8 people
Subpod Mini (Dimensions 19.4″ L x 20.4″ W x 16.7″ H)
- Great for smaller gardens
- Composts up to 22 lbs of food per weeks, for households with 1-4 people
Modbed Bundle (Dimensions 35.4″ L x 23.6″ W x 31.4″ H)
- Includes 1 Subpod Mini, the Modbed Planter, and the garden aerator
- Ideal for balcony or patio composting – no need to plant in the ground
For our family of 4 (2 adults and 2 children) with a modest suburban garden, I choose to try the Subpod Mini, which has been the perfect size to handle our composting needs.
2. It’s easy to assemble.
Following the easy to read directions for a quick and simple assembly, I put together the Subpod Mini by myself in just a few minutes.
Simply, snap the 4 sides into place and attach the lid with the metal latches. Viola!
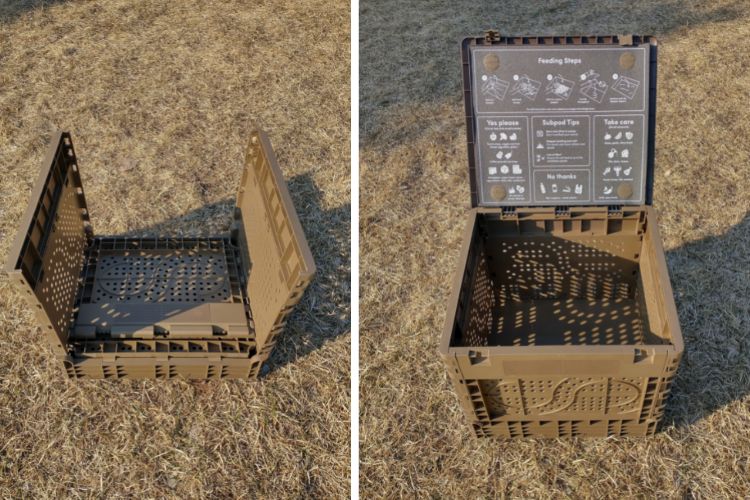
Now, the Subpod is an in-ground composting system, so the container does need to be buried about 12 inches in the ground. The next step of planting the Subpod in the ground can take a little more planning depending on how pretty you want to make it.
Options for Planting the Subpod
- Directly into the ground: quickest & easiest option, although Subpod recommends planting into a raised bed as the soil temperature stays more moderate for the worms
- Metal Subpod Grow Garden bed
- Custom raised bed
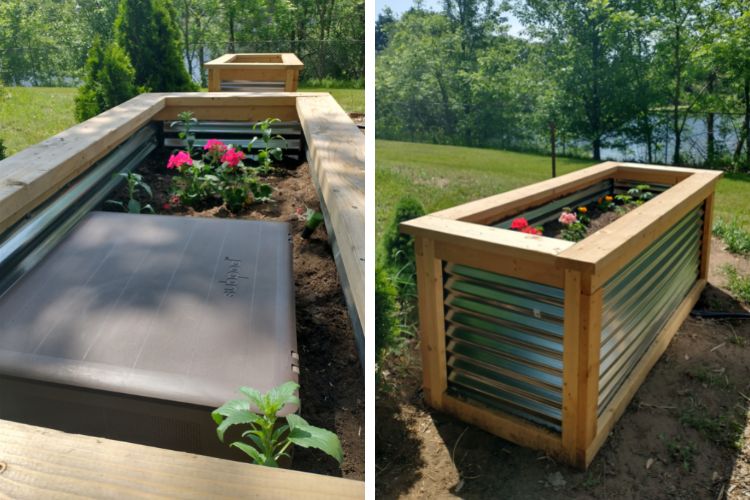
We decided to build our own custom raised garden beds and plant our Subpod within one. With wood prices being so high, we used a combination of corrugated metal sheets and wood boards. So happy with how they turned out!
3. Subpod’s visually appealing design blends into the garden.
When I was deciding on a garden compost system, I debated between a rotating compost bin and an in ground design.
Ultimately, one of the deciding factors for me was the visual impact of the compost system. I like that the Subpod blends right into the garden rather than a bulky container that sticks out like a sore thumb.
4. The Subpod in-ground worm composting system breaks down food faster than traditional compost bins.
The Subpod uses vermicomposting, which means worms help with the composting process. The worms in their natural habitat underground help break down food scraps faster than traditional compost bins above ground.
With all the food scraps I put in each week, I wasn’t sure if the Subpod would fill up quickly. So far, in these first 4 months, the volume in the bin has increased overall but it is nowhere near full yet.
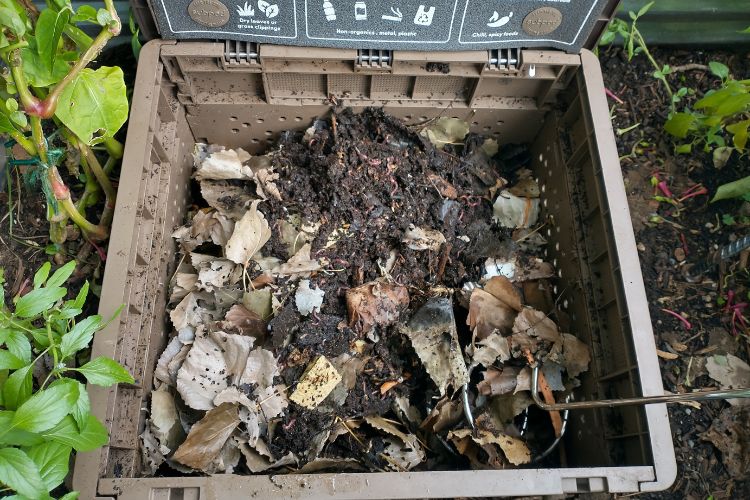
I have yet to harvest the Subpod to use the compost as fertilizer but that’s something I’ll likely do in the spring.
5. It’s easy to maintain – with minimal odor.
Typically, I add my food scraps from my indoor compost caddy to my Subpod Mini every 1 or 2 days. With the load of food scraps, I throw in a few handfuls of dried leaves from my yard. Then, I’ll quickly aerate the compost bin with the handy Subpod aerating tool.

So far, I haven’t had any major issues with odor. There was a short period where I put lots of food scraps in without many leaves and the compost started to smell a bit. I followed the instructions on the lid and put in extra leaves and it was back to normal in a few days.
Overall, if you keep a high ratio of carbon (dried leaves, brown compostable paper) to food scraps, odors shouldn’t be a problem. The ventilation holes surrounding the top of the Subpod help minimize odors too.
6? The in-ground Subpod is supposed to provide stable soil temperatures that allow composting year-round.
I have yet to put this one to the test! And I am eager to see how the Subpod does in the cooler temperatures. After the upcoming Midwest winter, I’ll post an update here after evaluating how winter composting goes.
Subpod Promo Code
Now, the Subpod is not the cheapest composting system on the market. However, for me, the benefits of a visually pleasing design, faster composting, and (hopefully) year-round composting make the Subpod a worthwhile investment.
Using a Subpod promo code can help make your composting investment more affordable. If you would like to try a Subpod garden compost system yourself, use LEAH10 to receive 10% off your Subpod purchase.
Subpod FAQs
How many worms do I need for a Subpod?
With the Subpod Mini, I started with 1,000 worms. I followed the Subpod guidelines of slowly acclimating my worms over the first few weeks (only adding a little bit of food at a time). Now, the worms are thriving!
Does the Subpod smell?
So far, adding enough carbon (dried leaves or compostable brown paper) with each load of food scraps has been effective at keeping the Subpod smell neutral.
Is Subpod any good?
In my experience, yes! I have been using my Subpod garden compost system for 4 months now and I have been very happy with it.


